
Femoral Traction Devices
Objectives
To guide the use and application of femoral traction devices in the deployed setting
Scope
This guideline describes the indication and application of femoral traction devices, specifically the Thomas splint and Kendrick traction device (KTD), including adaptions for prolonged field care and paediatrics. It also refers to skin and skeletal traction.
Audience
This guideline is intended for the use of registered healthcare professionals in a forward medical locations or in an Emergency Department on deployed operations.
Initial Assessment & Management
Clinical Background
Patients with a femoral shaft fracture can lose 1500ml or more of blood into their thigh. This can profoundly affect their circulation and be a contributor to hypovolaemic shock.
Early management is with blood product/fluid resuscitation, analgesia and splintage, which contributes to the analgesic effect. This can be achieved using the Thomas splint or KTD, the application is described below.
Typically, the KTD is used in a pre-hospital setting, and once transferred to Deployed Hospital Care (DHC) the patient is transferred to a Thomas Splint (or equivalent) or skin / skeletal traction.
Kendrick Traction Device (KTD)
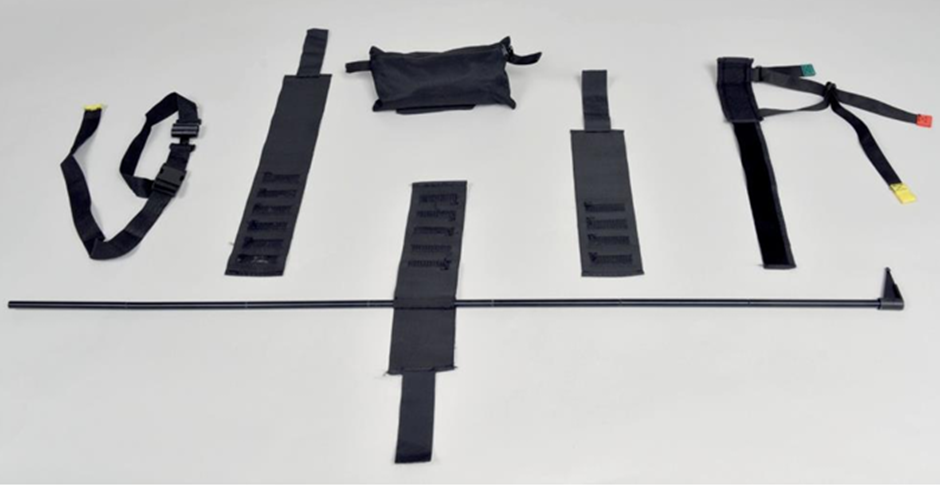
A KTD can be used in conjunction with a SAM Pelvic Sling. The KTD should be applied after (i.e. on top) the pelvic binder.
Indications: femoral fracture
Intentions: to reduce pain and bloods loss
Contraindications:
- Fracture or disruption of the patella
- Fracture to tibia or fibula
- Ankle fracture or dislocation
- Amputation to the affected limb
Preparation
- Pain relief must be considered prior to application of the KTD which will be an intensely painful procedure in the conscious patient
- Check all required parts are present
- Position the leg in the natural anatomical position.
- Assess distal circulation in the affected leg by checking for a distal pulse – document pre- and post-application neurovascular status of the limb.
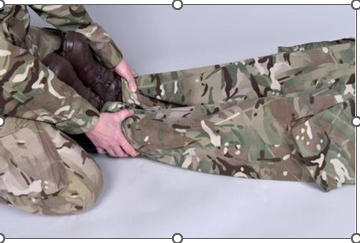
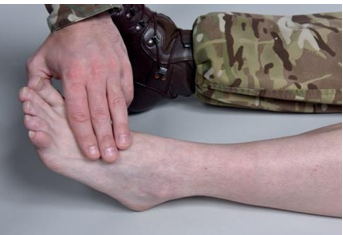
Application
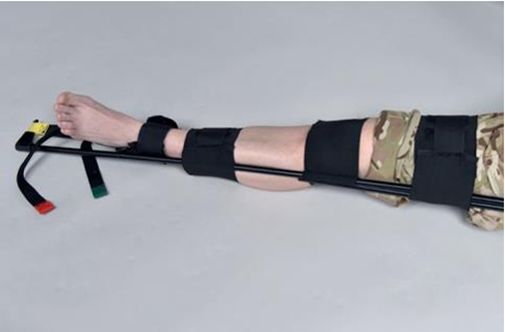
1. Apply ankle hitch ensuring the stirrup sits below the foot with the padded section against the achilles, securing the velcro strap around the ankle and tighten the green tabbed strap under the foot.
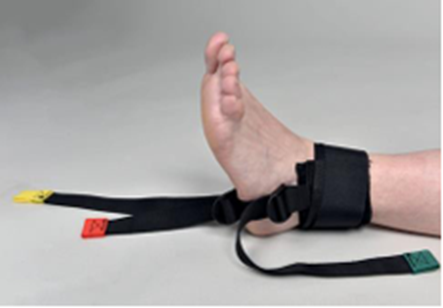
2. Apply the anchor strap to the upper thigh of the injured limb, positioning in the groin area ensuring genitalia are not trapped under the strap. The traction pole receptacle should be positioned on the outer aspect of the leg at the level of the iliac crest.
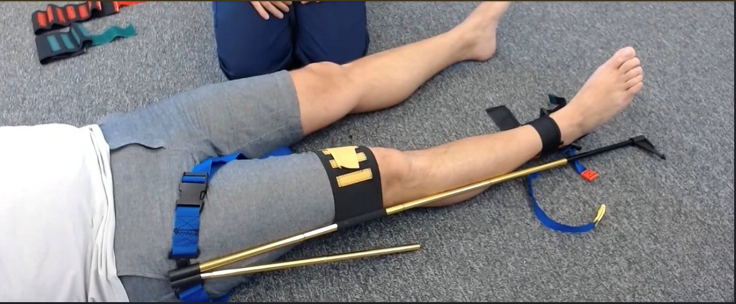
3. Measure and adjust the traction pole to fit the casualty, ensuring at least one complete pole section (with dart attached) is below the estimated level of the foot once pulled to length. Then insert the top of the pole into the traction pole receptacle on the anchor strap.
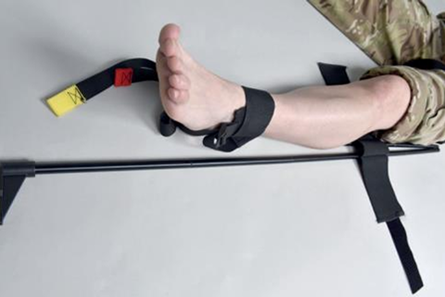
4. Secure the elastic knee strap around the knee. Then place yellow loop on the ankle hitch over the dart on the foot end of the pole.
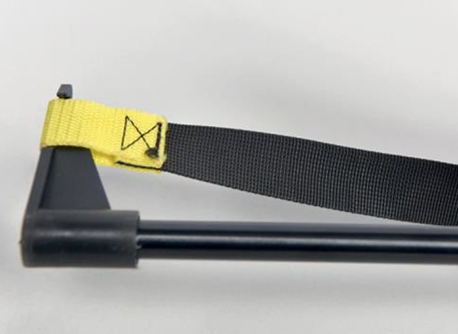
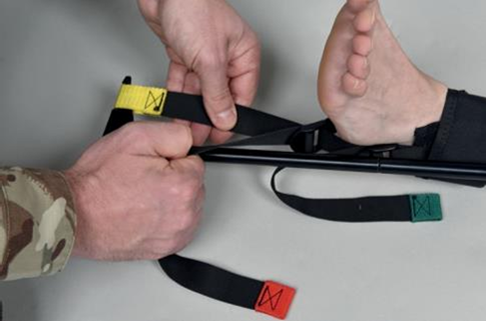
5. Apply traction by pulling the red tab whilst feeding the yellow tab through the buckle. Counter traction must be placed against the dart on the foot end of the pole at the same time.
6. Assess distal circulation after application by taking a distal pulse. Then apply the small Velcro strap above the ankle and the large Velcro strap on the thigh.
Thomas Splints
Kinetec® Thomas Splint and Skin Traction Application – this YouTube video provides a helpful guide on how to apply a Thomas Splint.
Preparation
- Positioning: Supine position. This is not a sterile procedure, but a social clean is advisable to remove debris from the limb which is about to be splinted. Exposure of the whole lower limb is essential.
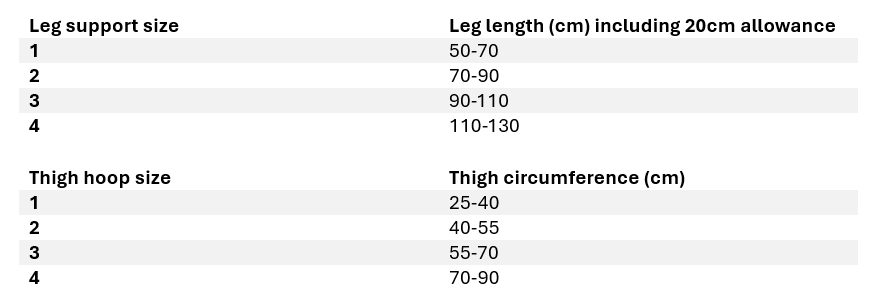
- Kit: Kinetec Thomas Splint comes in range of sizes from 50-130cm inside leg measurement and 4 proximal hoop sizes.
-
- To provide additional comfort to the patient, the Thigh Hoops can have a foam tube padding added. Simply slide a Foam Cover over the Hoop Cover and cut to length.
- Measuring: Measure the patient’s uninjured limb.
-
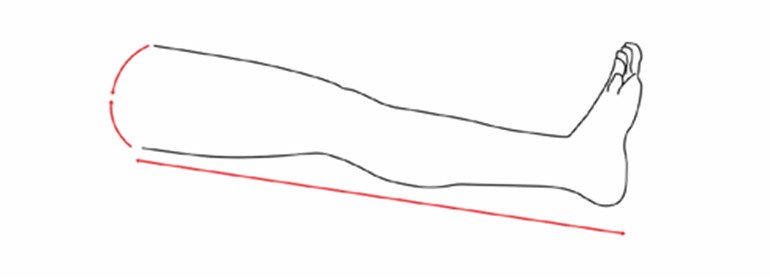
- To select the correct the Leg Support, measure inside leg from groin to the bottom of the heel. Add another 20cm to allow for ankle plantar flexion in the splint and for the application of a windlass.
- To select the correct the Thigh Support, measure the thigh circumference near the groin at an oblique angle to determine the thigh hoop size.
- To select the correct the Leg Support, measure inside leg from groin to the bottom of the heel. Add another 20cm to allow for ankle plantar flexion in the splint and for the application of a windlass.
Splint Preparation
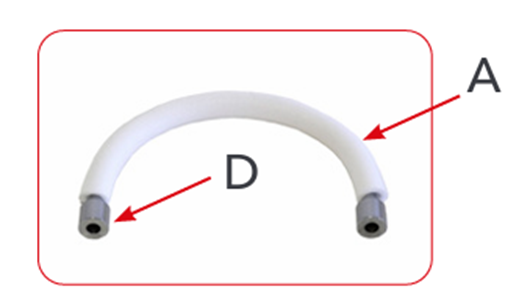
1. Place the thigh hoop foam (A) on the thigh hoop (D), cutting it to fit the length of the thigh hoop.
2. Place the hoop cover (B) around the thigh hoop. Fully open the protector to lay it flat on a table, then position the thigh hoop in the centre.
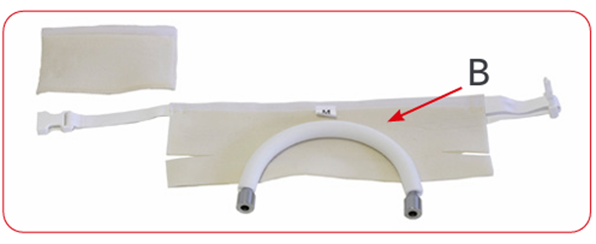
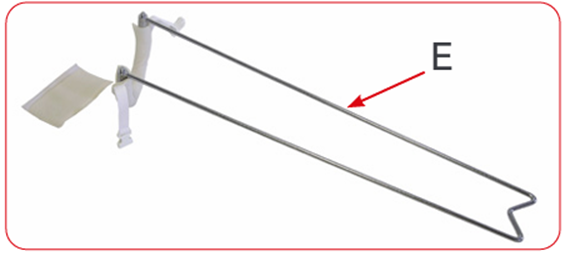
3. Position the protected thigh hoop on the leg support (E), held in place by magnets.
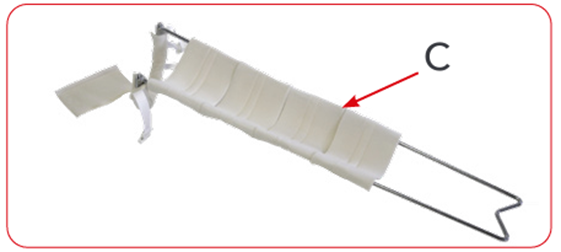
4. Place the slings (C) over the leg element, starting from the top (thigh side). Attach each sling in turn to form a support. The slings cover the splint up to the patient’s malleolus, so as not to impede ankle movement and allows for skin inspection.
5. Turn the Thomas splint over and secure the slings together using the hook and loop pieces.
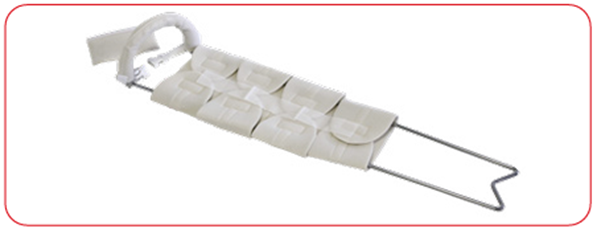
6. Thomas splint is ready to receive the patient’s leg.
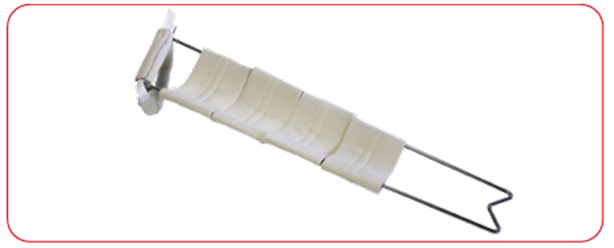
Skin Traction
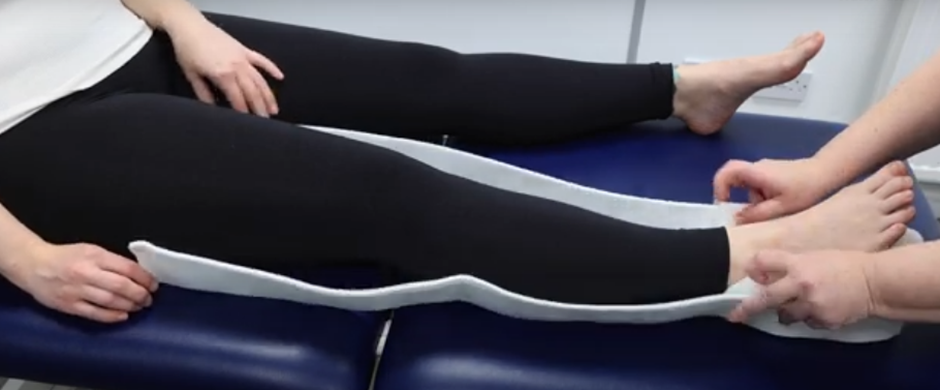
1. One person should apply traction to the injured leg while the other puts on the skin traction.
2. Position the traction strip along the leg, ensuring it covers the bony prominences. (Note: In reality the limb would be fully exposed)
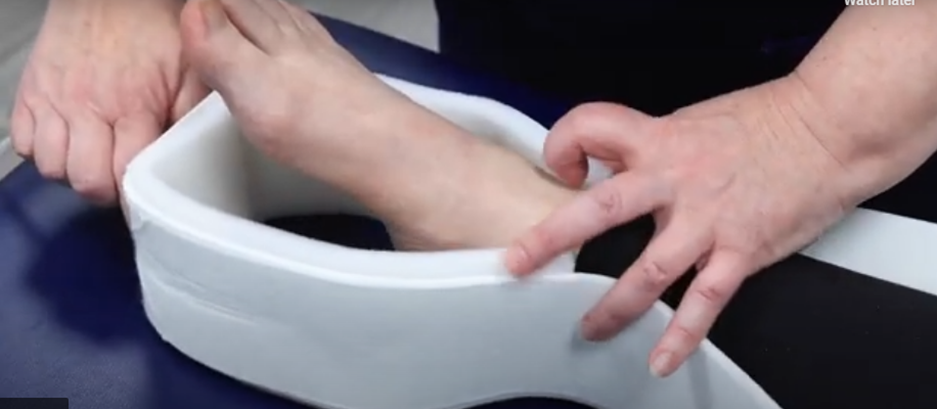
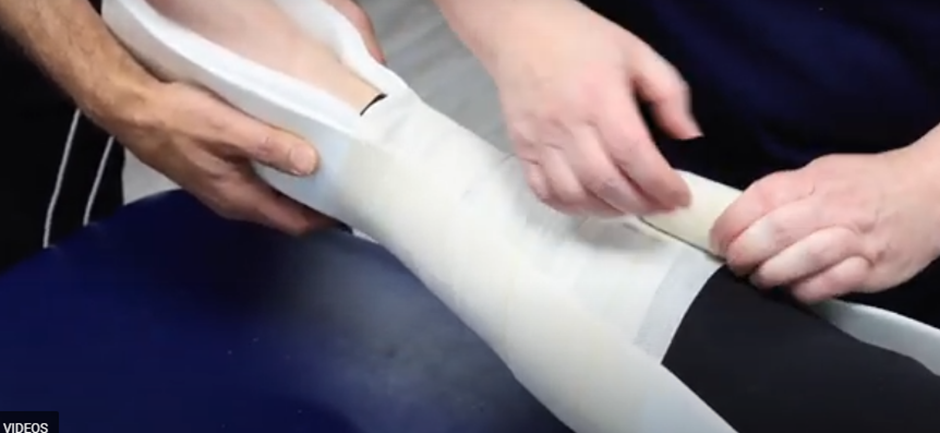
3. Secure the traction strip using a bandage, maintaining even tension.
- Bandage the lower leg and secure with tape
- Leave the knee and popliteal fossa free to avoid pressure to nerves and vessels
- Bandage the traction splint above the knee and secure with tape
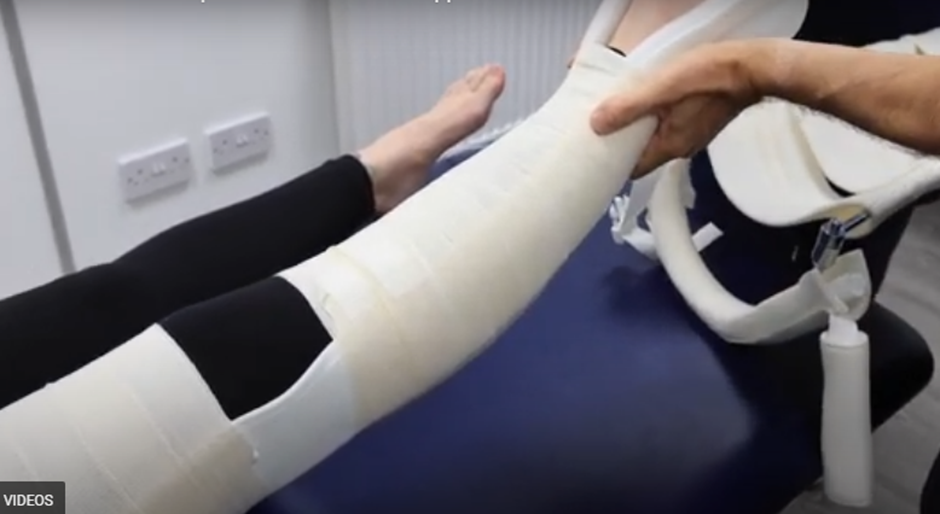
Applying traction:
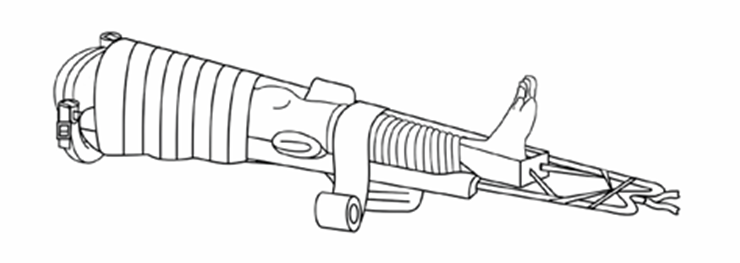
1. To avoid external rotation of the leg, pass one chord over then under the bar and the other under then over the bar.
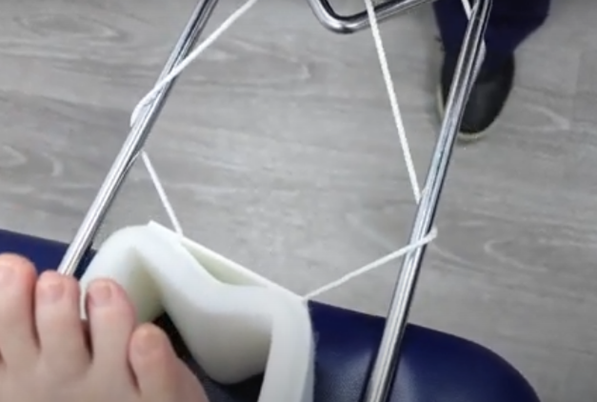
2. Then apply tension and attach the chords to the bottom of the splint. Secure with a knot.
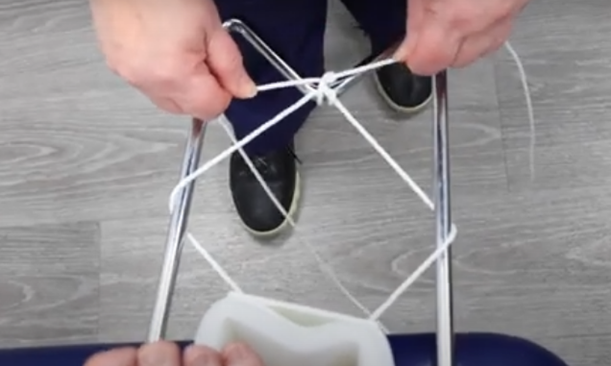
3. Adjust traction with the windlass. Insert the windlass between the chords. Turn the windlass to increase tension. Once at the correct tension, secure the windlass by wrapping the chords around it. Correct tension is enough to immobilise the fracture and keep the limb from moving, but not so much that they have significant pressure on the proximal hoop or to compromise the vascular supply to the foot.
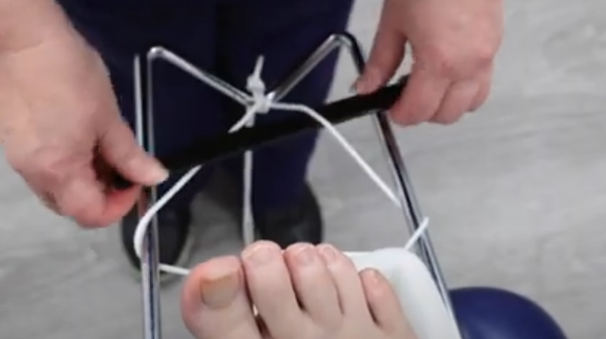
Securing for transport
For extra security, bandage the patient to the splint.
Skeletal Traction
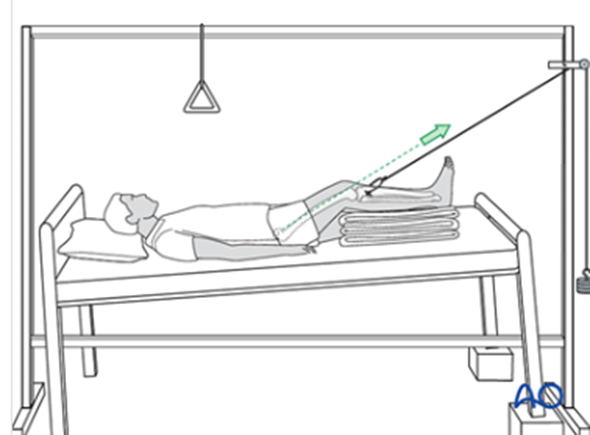
If in a location with Orthopaedic surgery support, skeletal traction may be an option if traction would be required for longer period of time.
Skeletal traction can be applied either through a distal femoral or proximal tibial pin.
It is applied in anticipation of definitive operative management when other methods of closed reduction and immobilization are not suitable. Consult orthopaedics colleagues by secure means if the senior treating clinician thinks this may be necessary.
Prolonged Casualty Care
Pressure sores
- Ensure bony prominences are covered with appropriate padding when applying the traction device
- Avoid wrinkles in bandages and dressings
- Check pressure areas regularly
- Reposition patient as able to alleviate pressure areas
Neurovascular integrity
Check the injured limb regularly for signs of neurovascular compromise and document findings. Escalate if any change indicating compromise is noted.
- Check peripheral pulses
- Check capillary refill time
- Check sensation distal to the injury
Infection
If there are any areas of broken skin, including pin sites for skeletal traction, there is an increased risk of infection. These areas should be monitored regularly looking for signs of infection:
- Redness
- Warmth
- Discharge
- Swelling
Venous thromboembolism
These patients will be immobilized and non-weight bearing, therefore at increased risk of DVT and PE. If possible, pharmacological VTE prophylaxis (see deployed formulary) should be prescribed and / or anti-embolism stockings for the non-injured leg if available.
Duration of traction use
There is no definitive guidance on how long a Kendrick Traction device can be applied for, but ideally this should be for as short a time as possible (<24 hours) and switched to either a Thomas Splint or other form of traction (skin or skeletal) as soon as feasible. These traction methods can be used for much longer periods of time (days to weeks) but the same regular monitoring of neurovascular status and pressure areas applies.
Paediatric Considerations
The Kinetec Thomas splints can accommodate a minimum inside leg measurement of 50cm, this may be small enough for some children. For much younger children with shorter leg lengths, a KTD offers more flexibility in sizing.