Initial Assessment & Management
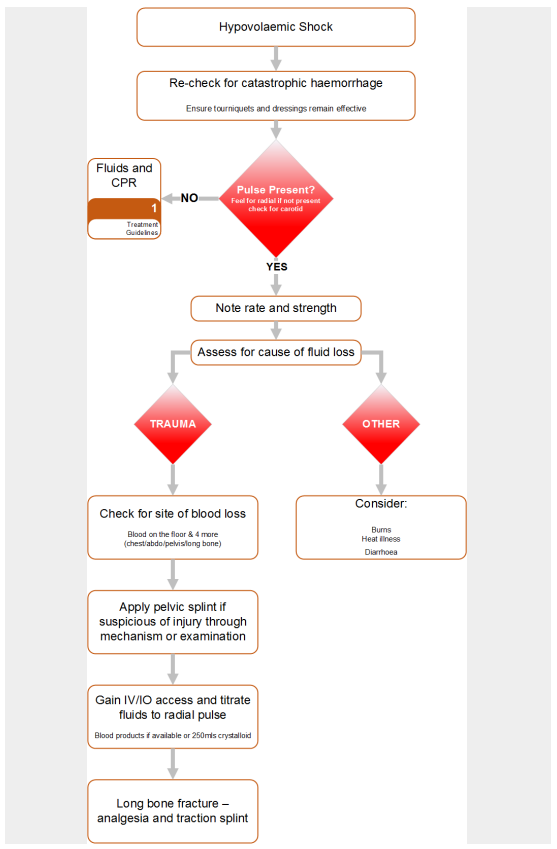
Hypovolaemic Shock
Step 1
• Stop external bleeding - Go to Catastrophic Haemorrhage
Step 2
• Assess the cause of the hypovolaemic shock:
- haemorrhage (trauma or non-trauma)
- plasma (burns)
- electrolyte solution (diarrhoea and/or vomiting)
Step 3
• Estimate the degree of hypovolaemic shock from the table
Diarrhoea and/or vomiting
• Start fluid resuscitation with 0.9% NaCl (normal saline) or Hartmann’s solution. Refer to
Compendium for specific treatment of infectious causes of D&V.
Consider Sepsis
Related guidelines:
- Heat illness
- Burns
- Estimate the size of the burn using the Rule of Nines or the Lund and Browder Chart.
- National Early Warning Score (NEWS)
(Resource: FMED 1061)
- Level Of Consciousness
- Estimate the weight of the patient to the nearest 10kg.
- Estimate the time since the injury to the nearest hour.
- Now use the Burns calculator to determine the fluid requirement. Fluid is replaced as N/Saline solution only pre-hospital. Once at hospital use Hartmann’s.
Go to Toolbox:
Waterlow Assessment
Advanced Assessment & Management
Fluid replacement strategy in haemorrhagic shock
- The optimum treatment for haemorrhage is definitive surgical control of bleeding and volume replacement with blood products.
- Where blood products and/or surgical facilities are not available, a restrictive resuscitation strategy should be used for the first hour after injury – aim to maintain a palpable radial pulse.
- Give 0.9% NaCl (normal saline) or Hartmann’s solution in 250ml aliquots and assess response.
- In patients with hypovolemic shock and a severe head injury, or if the patient is pregnant or is a child, aggressive management to maintain a strong radial pulse should be undertaken.
- When possible to take a formal BP, the target Blood Pressure in these cases should be a systolic of 110 mmHg.
- In ALL cases, 1 hour post-injury, aim for a strong radial pulse (systolic of 110mm Hg)
- Use 1g tranexamic acid as soon as possible in patients with major trauma and hypotension due to bleeding.
- If blood products are available, a major haemorrhage protocol should be utilised.
- Monitor the effect of volume resuscitation using the pulse rate, pulse pressure, blood pressure, respiratory rate and hourly urine output.
Note military guidance differs in that it does not differentiate between blunt and
penetrating trauma.
Intraosseous Access
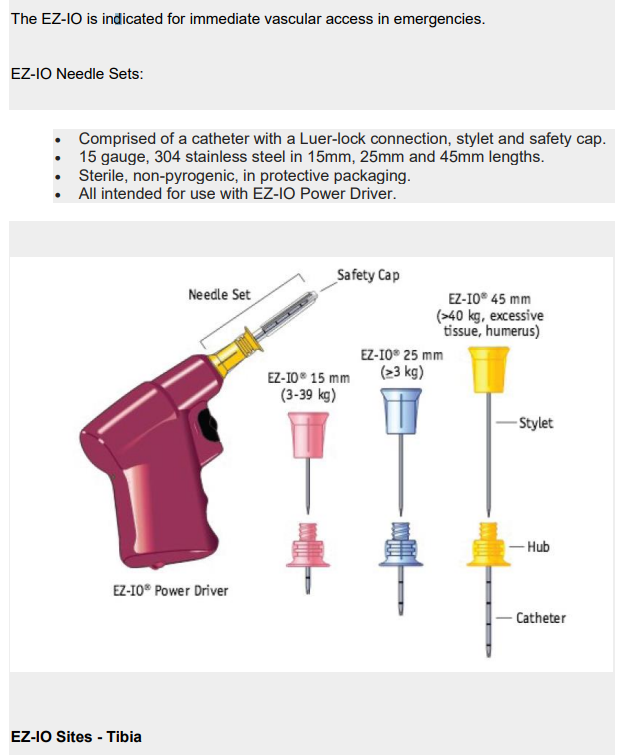
Anterio-medial aspect of the tibial tuberosity:
• Lay patient supine on stretcher
• Extend the leg
• Identify the tibial tuberosity
• Measure approx 3cm down and 2cm medially.
• Use BLUE needle as the first choice
• Ensure needle size is appropriate before drilling

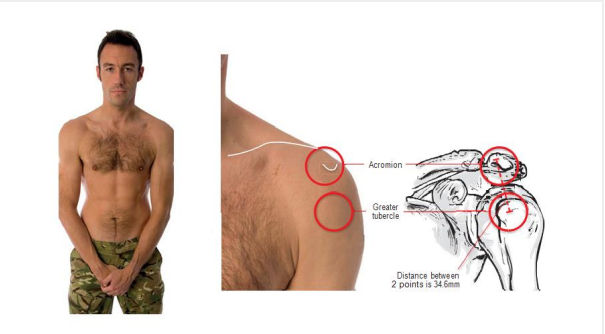
EZ-IO Sites - Humerus
• Lay patient supine on stretcher
• (Patient's) hands over testicles
• Trace clavicle from sternum to acromium
• 2 finger widths down
• Feel the tubercle
• Drill into patient
• Use a YELLOW needle for servicemen
EZ-IO Insertion
IMPORTANT: Do NOT touch the needle set with your hands or fingers.
• Position the Driver at the insertion site with the needle at a 90 degree
angle to the bone.
• Push the needle through the skin until it is firmly against the bone ensuring
that at least one black line is visible above the skin prior to drilling.
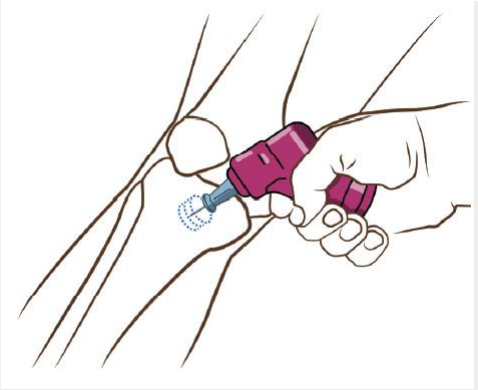
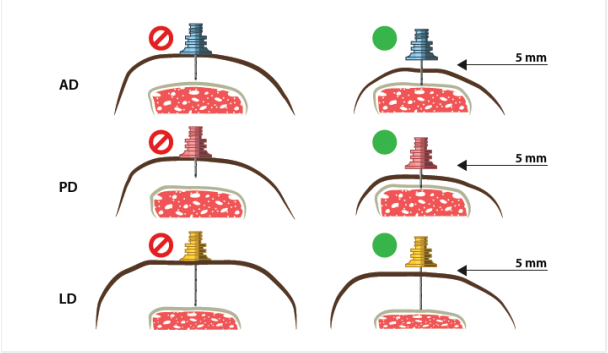
IMPORTANT: Control the patient's movement prior to and during insertion.
• Penetrate the bone cortex by squeezing the Driver's trigger and applying
gentle, steady downward pressure.
• Release the Driver's trigger and stop when:
1. A sudden "give" or "pop" is felt upon entry into the medullary space.
2. The desired depth is obtained.
IMPORTANT: Use gentle-steady pressure. DO NOT USE EXCESSIVE FORCE.
Allow the needle set rotation and downward pressure to provide penetrating
action.
Note: If the Driver stalls and will not penetrate the bone, you may be applying too much
pressure.
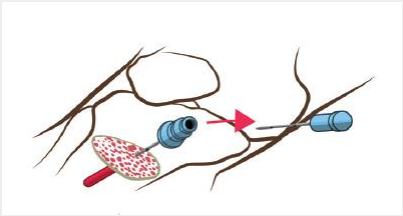
• When the needle is seated correctly, unscrew the introducer and dispose of
the sharp.
• Attach the primed extension set to the EZ-IO catheter.
Do NOT attach a syringe directly to the EZ-IO catheter hub.

• Aspirate a small amount of marrow to confirm placement.
• Flush the EZ-IO catheter with 10mls of normal saline
Note: Frequently monitor the insertion site for extravasation.
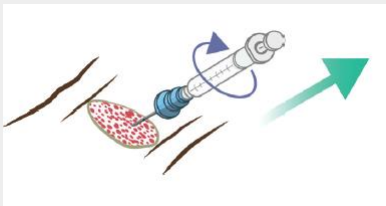
To remove the catheter from the patient, attached a Luer-lock syringe,
continuously rotate clockwise which slowly and gently applying traction to
the catheter.
Do NOT rock or bend the catheter during removal.
- Dress the site as appropriate.


